(Updated for 2.01 firmware)
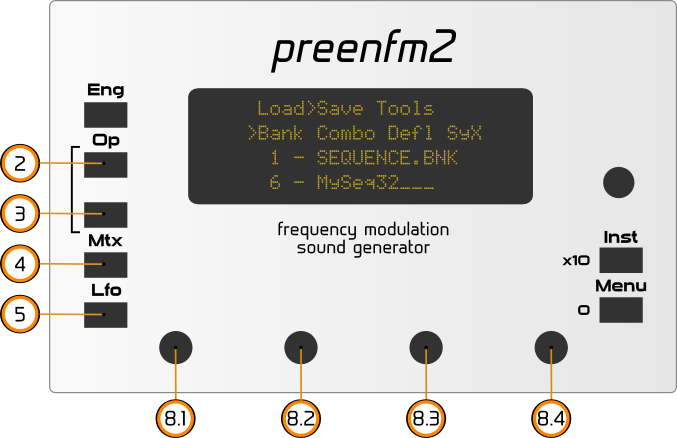
You enter the Menu mode from the edit mode by pressing once the menu button. And exit by pressing « Inst » whose function is « Back » in the menu mode.
To navigate through the menu, you control the ‘>’ cursor by turning any encoder, then to confirm the current choice press ‘Menu’, or ‘Inst’ to go back.
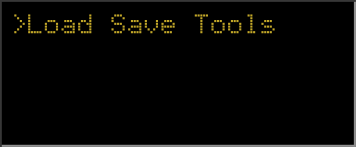
The 3 main parts are Load, Save, Tools.
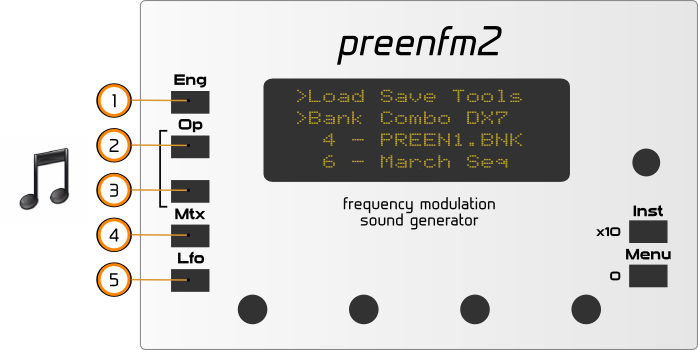
1. Load
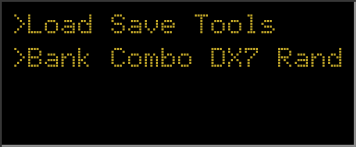
Selecting Bank will allow you to load a preset from a bank.
The preset will replace the current instrument you were seeing in the edit mode.
Browsing the preset without confirming will allow you to hear the sound of it, it temporary replaces the current selected instrument. If you go back at any moment, you’ll retrieve the sound you had before entering this menu.
In every preset menu, turn encoder 2, 3 or 4 to move faster.
While selecting the sound you want to load, you can play with the 5 left buttons to hear the sound at different pitch. Middle button can be modify in the settings.
Pressing Menu will load the preset.
Selecting Combo will allow you to load 4 presets at a same time replacing the 4 instruments. Combo are usefull to save a instruments set associated to a specific song in your sequencer.
Selecting DX7 browses the DX7 bank you can put on your USB stick.
Selecting Rand allows you to randomize a part of (or all) your current preset.
Note that a randomization is triggered when you hit one of the left buttons. The randomization applied depends on your current selection. Each module can be set to keep, if you don’t want to change its values.
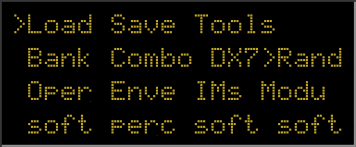
- Oper / operator : keep = don’t change, soft = randomize with soft and harmonic values, medi = randomize with medium values , high = 100% randomization can be very harsh and inharmonic.
- Enve / Enveloppe : keep = don’t change, perc = randomize with percussion type sound, pad = randomize with pad type sound, rand = 100% randomization
- IMs / indices of modulation : keep = don’t change, soft = radnomize with low values which give soft sounds, med and high add more modulation between operator and give richer sounds.
- Modu / Modulation : keep, soft, med, high : med will add more modulation than soft, and high will add more modulation than medium.
You modify the randomization values with the 4 encoders than you can trigger a new randomization by hiting one of the left buttons.
If you want to go back to your original sound press back button.
If you want your changes to be permanently applied to your preset, press the menu button.
Tip : Keeping everything but Modu, can give a new life to DX7 imported presets.
2. Save
Note : Presets can be saved only into preexisting Banks or Combos. <empty> are not usable slots as there’s nothing linked to them on the USB drive. To save a preset in an empty slot, you must first create a Bank or Combo in that slot by going to Tools > Crea. Once you have created a Bank or Combo slot, you will find it under Menu > Save.
In Save you’ll find mainly the same menus as In Load.
Except you cannot save under DX7 format.
An important feature is the Defl (Default) option in the save menu. You can save here the combo that you want to be loaded when the PreenFM is switched on.
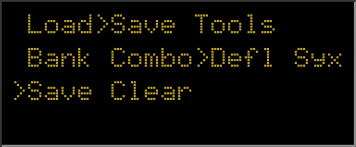
The 4 instruments are saved in your default combo. Use clear to reset to default combo.
Save Sysex will dump the current preset to the midi output. You can save it as a sysex file, then resend it to the preenfm2 any time to reload the preset.
In many case you’ll have to Enter a name such as on the display bellow.
The available symbols are : _ABCDEFGHIJKLMNOPQRSTUVWXYZ abcdefghijklmnopqrstuvwxyz 0123456789 .,;:<>&*$
To enter a text :
- Encoder (8.1) : move the cursor
- Encoder (8.2) : browse all letters in lowercase
- Encoder (8.3) : browse all letters in uppercase
- Encoder (8.4) : browse all available symbol
- (2) jump to symbol
- (3) jump to number
- (4) button : jump to space.
- (5) button : jump to first available symbol ‘_’ which is not taken into consideration when at the end of a name.Menu : Confirm.
3. Tools
In Tools you can modidy the main parameters of the PreenFM2 (Settings), Create empty Bank or Combo, Rename patch bank or Combo or make your preenfm2 use one of your Scala scales.
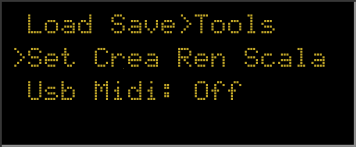
3.1. Settings
In the setting submenu, use encoder 1 to navigate through parameters and encoder 4 to change its value.
The available settings are :
- Usb Midi: Off by default. Activate this parameter if you want your PreenFM2 to be seen as a midi device through the USB connection.
- Mdi ch. 1: default is 1. Midi channel that Instrument 1 will listen to. All 4 instruments can listen to the same midi chanel.
- Mdi ch. 2: default is 2. Midi channel that Instrument 2 will listen to.
- Mdi ch. 3: default is 3. Midi channel that Instrument 3 will listen to.
- Mdi ch. 4: default is 4. Midi channel that Instrument 4 will listen to.
- Midi thru: copy midi in to midi out. Works with midi jack. Usefull to chain several devices on different channel.
- Receives : do the preenFM2 listen to midi control change (CC), NRPN, both or none
- Send: On any value change, must the preenFM send midi information.
- Program ch: specifies if you want the preenfm2 to respond to program change midi command.
- Boot : change the default value if you want the PreenFM2 to boot directly in a menu mode : bank, combo or DX7.
- Op Buttons: New. Use old if you want PreenFM1 behaviour for the 2 operator buttons in edit mode.
- Rot Enc: 12 or 24 depending on the type of encoder you have on your PCB. If one tick gives you 2 value change or if you have to turn 2 ticks to get one change, this is the value to modify.
- Test note: middle test note. To test current instrument, go back in edit mode. Hold « Inst » and play with the 5 left buttons
- Test velocity: velocity used by the test note.
- Clock Led: set it to yes if you want the led to blink on BPM of the external midi clock.
- Arp in Preset: No. By default the preset does not load neither save the arpeggiator setting. This allows you to browse presets while keeping your arpeggiator. If you want to load and save the arpeggiator with presets change here. Arpeggiator settings are ALWAYS saved in the combos.
- Oled Save: Off, 2m, 5m, 10m, 1h. OLED owner may want to save their OLED display life. This is a screen saver.
- Unlinked Edit : allow the current edit page to be different for each of the 4 instrument. Default is no.
- Boot sound : no. Set it to yes to put back the boot sound.
- Firmware: nothing to chose, just the firwmare version to check.
3.2 Create
allows you to create empy patch banks or combo banks.
3.3 Rename
allow you to rename you current patch, one of you patch banks or one of you combo banks. An easier way today is to simply modify the files buy accessing your USB drive from the you computer by booting in the bootloader.
3.4 Scala scale files
Scala has been added in firmware 2.00.
Use the bootloader to access your Usb drive (Hold ENG button while switching on) / Or unplug your USB stick.
Add a « scala » folder inside « /pfm2/ ».
Put your favorite *.scl file in /pfm2/scala/ ». Only 128 files will be selectable from the preenFM.
Rename them if needed so that their name before « .scl » has 8 chars max.
4500 scales are available at the bottom of this page :
http://www.huygens-fokker.org/scala/downloads.html
Any modification in this menu is saved only if you press Menu one more time when you are on the last line line. You’ll then see the « Done » message.
If you modify the values and go up, the modification are only valid untill you reboot your preenfm2.
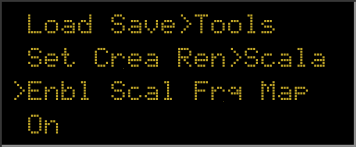
If you want to use one of your scala scales, select Enbl (Enable) and turn the value to On.
This makes the 4 instruments of your preenfm2 to be scala sclale mode.
The Scal menu will allow you to navigate through the 128 first scala scales files that will be found in the ‘/pfm2/scala’ folder. Use the right encoder to navigate quicker.
Then in Frq you’ll be able to tune your scale. What you adjust here is the frequency of the middle C note. A scala scale file only define intervals so a frequency reference is required.
The last option Map is set to Keyboard by default. In this mode, it will always make a C starting each scale. This is relevant for scales with number of notes different from 12. The keyboard mode makes scales easier to play on… keyboard.
‘Continuous’ option will start each next scale right after the previous one is finished, which make it harder to play on keyboard, but can be usefull with other kind of midi controller.